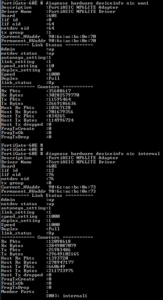
diagnose hardware deviceinfo nic wan1
diagnose hardware deviceinfo nic internal
diagnose hardware deviceinfo nic internal1

The windows root
diagnose hardware deviceinfo nic wan1
diagnose hardware deviceinfo nic internal
diagnose hardware deviceinfo nic internal1

Setup digital signature in Adobe Acrobat:
We will be covering two scenarios for using Apple’s AirPods’ with a Windows 10 computer:
Before pairing, make sure that AirPods are at least 40% charged. If not, insert into the AirPod case, and charge it. Keep it inside for the pairing process.
Technically, once paired, your AirPods should be able to auto connect to already paired devices. But the chances are that you have it connected to your phone or tablet. So if it doesn’t connect automatically, it is best to connect it manually.
If it still keeps connecting an disconnecting, read our guide on how you can fix AirPods frequent disconnection.
The guide should help you connect AirPods to your Windows 10 computer.
SOURCE: https://www.thewindowsclub.com/how-to-connect-airpods-to-windows-10-pc
UPDATE 6/11/2020:
https://www.reddit.com/r/airpods/comments/f7jpj7/using_your_airpods_with_their_microphones_on/
When paired to your regular Bluetooth connection, do this:
Control Panel
Settings
Devices
Devices and Printers (far right-hand side)
If you can’t find this, press WINDOWS KEY + R to bring up RUN, then type in CONTROL PRINTERS and click OK to get to the Devices & Printers screen
Find your AirPods “device” and then Right click on your headset & choose Properties (it must be connected, paired & active for you to adjust these settings below)
Click the Services Tab
De-Select/Un-check Handsfree Telephony and hit Apply/OK
You shouldn’t need a restart after this, but worth doing if it doesn’t work right away.
This is a bit of a work-around and doesn’t help you if you want to use it as a true headset in things like games for chat, or via Skype/WebEx/etc. That said, it’ll ensure that your headphones show up as only one device, with quality stereo sound… so you don’t accidentally select the hands-free audio device which produces terrible quality sound.
Solve a problem where Numlock is enabled in Microsoft Windows at startup with these steps.
Use the following PowerShell code:
Enable Num Lock:
Set-ItemProperty -Path 'Registry::HKU\.DEFAULT\Control Panel\Keyboard' -Name "InitialKeyboardIndicators" -Value "2"Disable Num Lock:
Set-ItemProperty -Path 'Registry::HKU\.DEFAULT\Control Panel\Keyboard' -Name "InitialKeyboardIndicators" -Value "0"SOURCE: https://www.technipages.com/enable-disable-numlock-windows-startup
How to Enable SSH on Ubuntu 18.04
Installing Kali Linux Tools using Katoolin on Ubuntu
Step 1 – Install Git
Launch the Terminal and enter the following command to install Git.
sudo apt-get install git
Check the Git version. As of today, it’s version 2.17.1.
sudo git –version
Step 2 – Install Python
Check for available Python version.
sudo apt-cache policy python
Available Python Version
Available Python Version
Start install Python 2.7.
sudo apt-get install python
Now check for installed version:
sudo python -V
Step 3 – Install Katoolin
Before installing Katoolin, clone git repository to our current location. Here we are going to clone git to “/opt” directory.
sudo git clone https://github.com/LionSec/katoolin.git
Clone Katoolin Git
Clone Katoolin Git
Copy the Katoolin binary to your path:
sudo cp katoolin/katoolin.py /usr/bin/katoolin
Give executable permission to katoolin:
sudo chmod +x /usr/bin/katoolin
That’s it. Katoolin is now installed. Let’s start using it.
Step 4 – Check Katoolin Interface and Options
Launch katoolin.
sudo katoolin
Now you can see Katoolin main interface and four options:
Katoolin Main Interface
Katoolin Main Interface
You will see a bunch of options:
Add Kali repositories & Update
View Categories
Install classicmenu indicator
Install Kali menu
Help
Let us discuss each of the options from 1 to 4 listed above in depth.
14 Vital Tips to Protect Your WordPress Admin Area (Updated)
MFA
IP ACLs
Strong passwords
No password hints
Account lockout
Password policy
Logging
Read Krebs on Security latest article Tricky Phish Angles for Persistence, Not Passwords and it sparked me to review my Office 365 security parameters.
The review of my Office 365 and Azure details took me to various articles and notes:
There is quite a bit of content here and the “Five steps…” link is the best one to start out with.
Need to take some time and review docs for Azure Advanced Threat Protection, Azure AD password protection, and Self Service Password Reset.
Subject: Request to Attend RSA Conference 2020
Dear Sir,
RSA Conference 2020 takes place at the Moscone Center in San Francisco February 24 – 28. The Conference offers five full days of educational training from experienced industry practitioners and is widely regarded as the world’s leading forum for cybersecurity professionals. Therefore, I would like to request approval to attend so I can gain an understanding of the latest industry issues and best practices that will help keep our organization ahead of the latest cyberthreats.
If I attend, I will have an unparalleled opportunity to learn about critical and emerging cybersecurity issues facing our organization through:
Cost ~ $5000.
Migrated this WordPress site from instance on Linux VM to WPEngine via these simple instructions.
This was a piece of cake!